


Rustic wedding invitations often use natural materials, earthy colors, botanical illustrations, and simple typography. Kraft paper, handmade cardstock, twine, and wood-inspired details are all popular choices for countryside weddings.
You can create many of these designs at home using printable templates and basic craft supplies. Others, such as engraved wood invitations or specialty printing, may require a professional printer.
Here are 10 rustic wedding invitation ideas, with materials, design suggestions, and instructions for recreating each style.
1. Kraft Paper Wedding Invitations
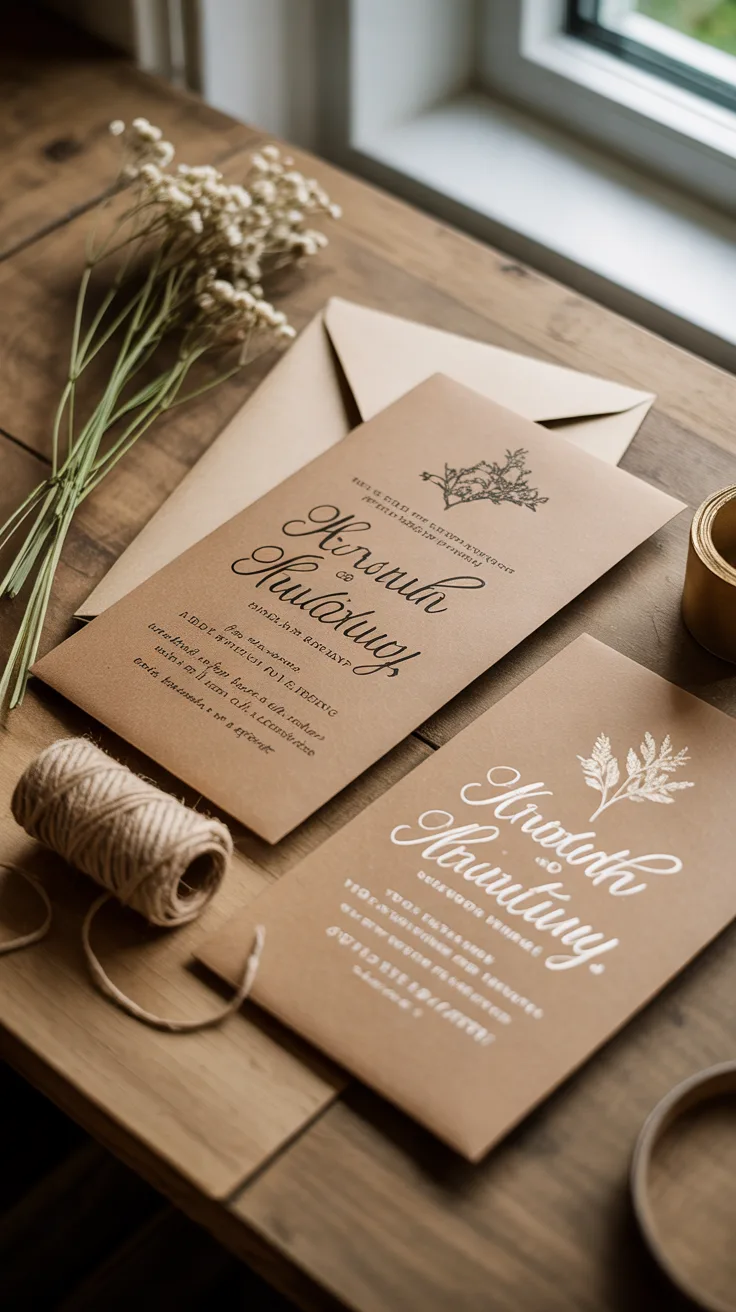
Kraft paper is one of the simplest materials for rustic wedding invitations. Its natural brown color works with white, black, forest green, and burgundy lettering. It also pairs well with twine, dried flowers, and cream-colored envelopes.
For a clean design, use black lettering with a small botanical illustration. If you prefer a more formal appearance, white ink or gold foil can provide contrast, although these finishes generally require specialty printing.
What You’ll Need
- Kraft cardstock, approximately 100–120 lb
- Invitation template
- Printer compatible with your cardstock
- Paper trimmer
- Cream or kraft envelopes
- Optional twine or wax seals
How to Make Them
- Create a 5-by-7-inch invitation layout using a design program or printable template.
- Choose dark lettering that will remain readable against the brown paper.
- Print a test invitation to check the colors, margins, and text size.
- Print the remaining invitations and trim them to size.
- Place each invitation inside a coordinating envelope.
- Add twine or a wax seal if you want a decorative finish.

View on AmazonAs an Amazon Associate, I earn from qualifying purchases.

View on AmazonAs an Amazon Associate, I earn from qualifying purchases.
Design tip: Avoid using too many decorative fonts. A simple serif font paired with one script font is usually enough.
You can find kraft cardstock for wedding invitations in different weights and sizes.
2. Wood-Inspired Wedding Invitations
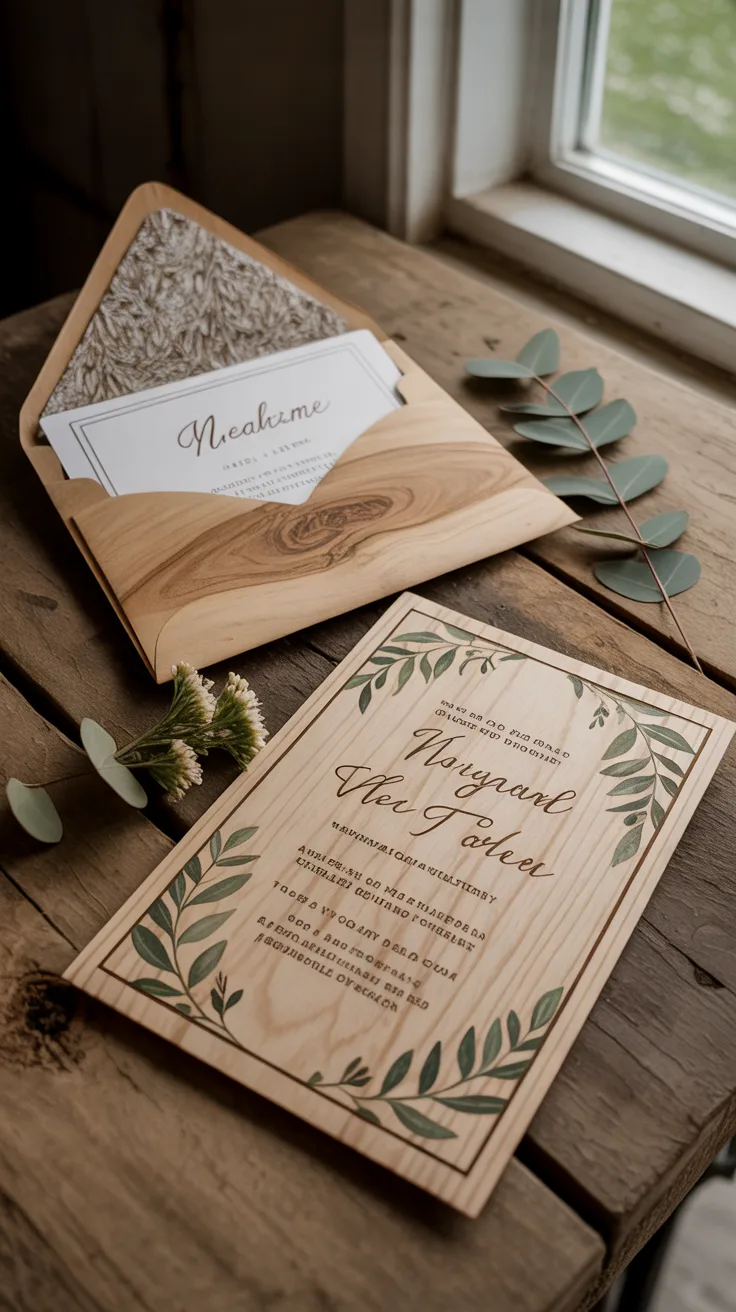
Best for: Barn weddings, woodland ceremonies, mountain venues, and outdoor receptions.
Wood-inspired invitations use either thin wood veneer or cardstock printed with a wood-grain pattern. Real wood provides a distinctive texture, while printed designs are easier to produce and mail.
Both styles work with simple typography, botanical borders, and neutral envelopes.
Two Ways to Create This Design
Option 1 — Real wood veneer: Choose thin wood sheets designed for invitations. Have the names, date, and wedding details professionally engraved or printed using equipment compatible with the material.
Option 2 — Printed wood grain: Use a digital wood-grain background in your invitation template. Add dark lettering and print the design on heavyweight cream cardstock.
| Material | Advantages | Considerations |
|---|---|---|
| Real wood veneer | Natural texture and distinctive appearance | Higher cost and specialty production |
| Printed wood grain | Affordable and easy to customize | Doesn’t have the texture of real wood |

View on AmazonAs an Amazon Associate, I earn from qualifying purchases.

View on AmazonAs an Amazon Associate, I earn from qualifying purchases.
Practical tip: Order a sample of real wood invitations before placing a large order. Check flexibility, thickness, and mailing requirements.
3. Wildflower and Botanical Wedding Invitations
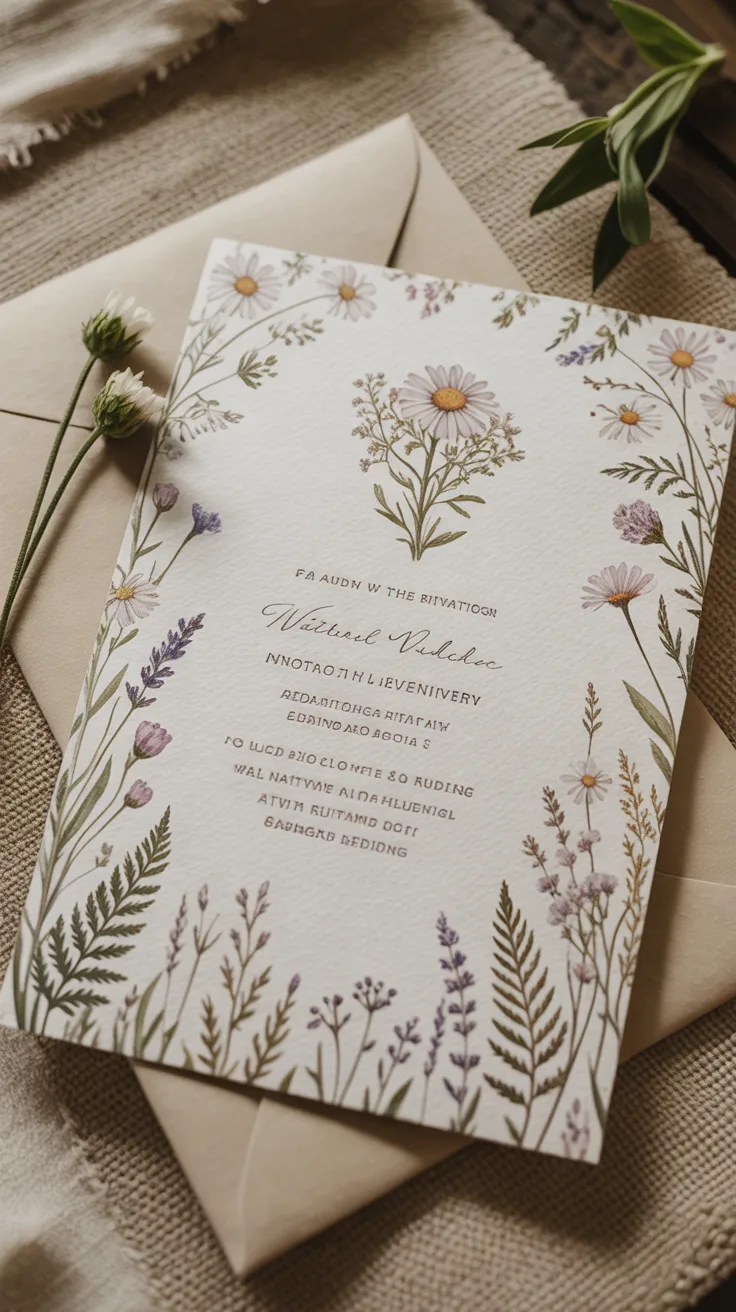
Botanical invitations combine rustic paper with illustrations of wildflowers, leaves, or greenery. They’re suitable for spring and summer weddings, garden ceremonies, and countryside venues.
Small botanical illustrations around the edges keep the invitation readable. You can also use a single floral illustration at the top, with the wedding details centered underneath.
Materials
- Ivory or cream cardstock
- Botanical invitation template
- Color printer or professional printing service
- Coordinating envelopes
- Optional dried lavender or pressed flower accents
Creating the Invitation
Start with a cream-colored invitation template and choose one or two botanical illustrations. Position the flowers in opposite corners or along one side of the card.
Use dark green, charcoal, or brown lettering for the main text. Keep the couple’s names slightly larger than the remaining details.
For a handmade finish, attach a small dried lavender sprig to the invitation using a paper belly band or narrow ribbon. Avoid placing fragile dried flowers loosely inside the envelope, where they may break during mailing.

View on AmazonAs an Amazon Associate, I earn from qualifying purchases.

View on AmazonAs an Amazon Associate, I earn from qualifying purchases.
Alternative: Print the floral illustrations directly onto the cardstock if you’re mailing a large number of invitations.
4. Twine-Wrapped Rustic Wedding Invitations
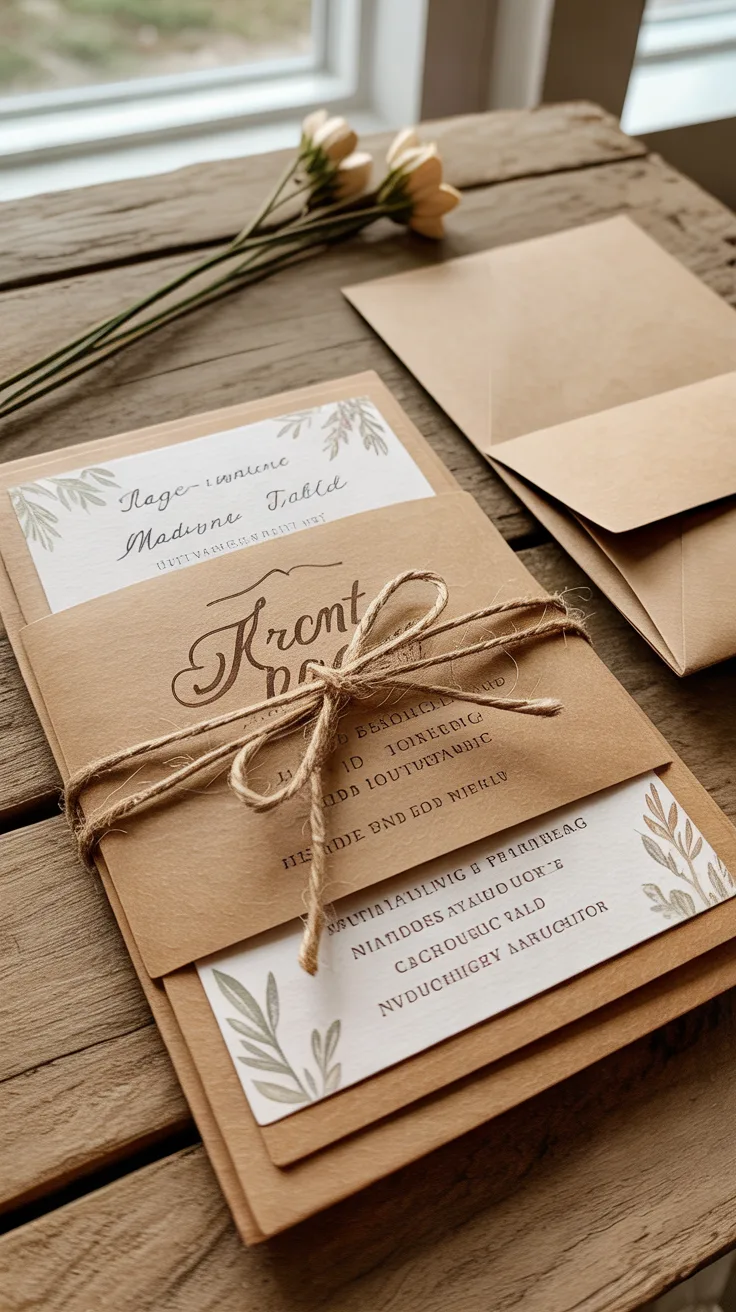
Twine is an inexpensive way to add texture to a plain invitation. It works particularly well with kraft paper, cream cardstock, and botanical designs.
You can wrap twine around a single invitation or use it to hold together a complete suite containing the invitation, details card, and RSVP information.
How to Assemble a Twine-Wrapped Invitation
Step 1: Print your invitation and any matching inserts.
Step 2: Stack the cards neatly, placing the main invitation on top.
Step 3: Cut a length of natural jute or cotton twine long enough to wrap around the stack.
Step 4: Wrap the twine around the cards and tie a small bow on the front.
Step 5: Trim the loose ends and slide the invitation suite into its envelope.
For a different finish, use a narrow strip of burlap as a belly band instead of twine. Secure it at the back with double-sided adhesive.
Mailing tip: Keep knots and bows relatively flat to reduce bulk inside the envelope.
Natural jute twine and burlap ribbon can be used for invitations, favor tags, and other wedding decorations.
5. Vintage Lace Wedding Invitations
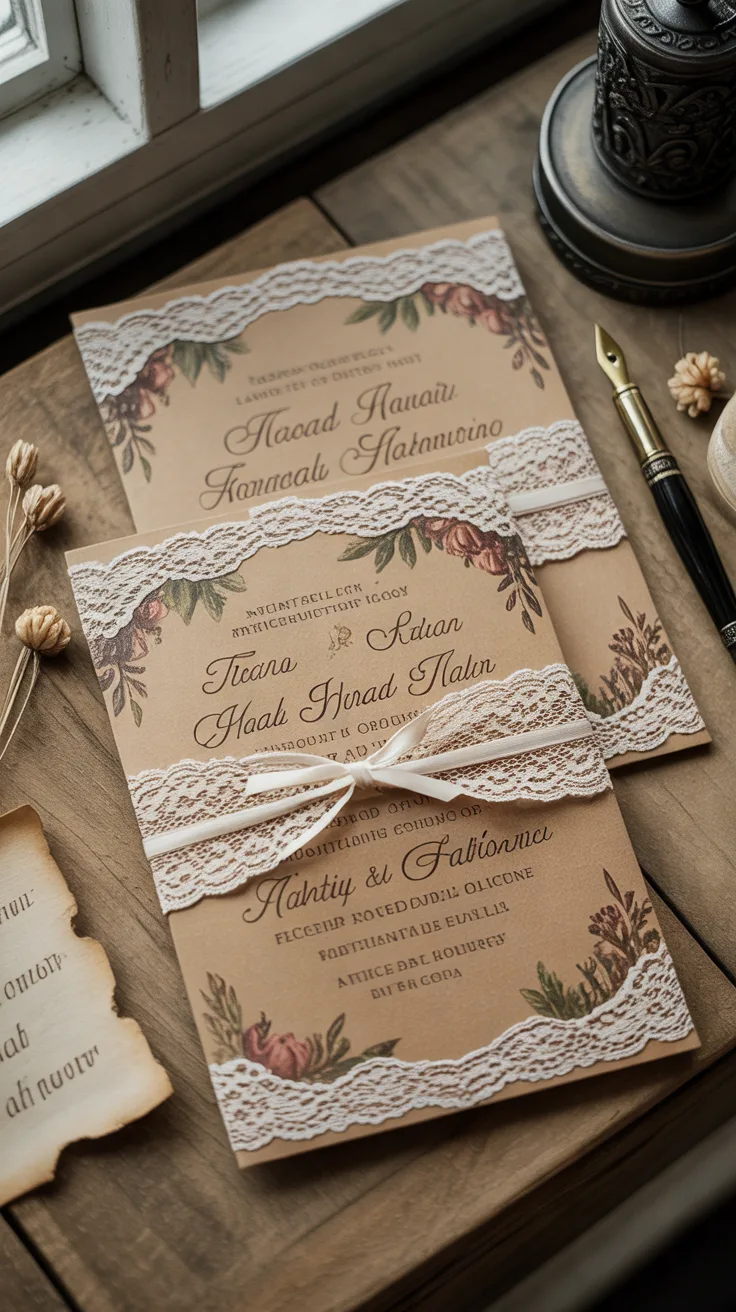
Best for: Vintage weddings, romantic barn receptions, and countryside celebrations with antique details.
Lace adds a softer appearance to rustic invitation designs. It works particularly well with kraft cardstock, handmade paper, and muted colors such as dusty rose, ivory, and sage green.
There are two practical ways to use lace: add a printed lace pattern or wrap the invitation with a narrow piece of actual lace.
How to Create a Lace-Wrapped Invitation
Print your wedding details on cream or ivory cardstock. Cut a strip of lace ribbon long enough to wrap around the invitation with a small overlap at the back.
Secure the ends with a small piece of double-sided tape or a fabric-safe adhesive. Make sure the adhesive doesn’t soak through the lace or stain the cardstock.
For a more decorative version, place the invitation inside a kraft paper pocket and wrap the pocket with lace.
Design tip: Use lace sparingly. A narrow band across the center or lower portion of the invitation is enough to add texture without covering the printed details.
6. Watercolor Countryside Wedding Invitations
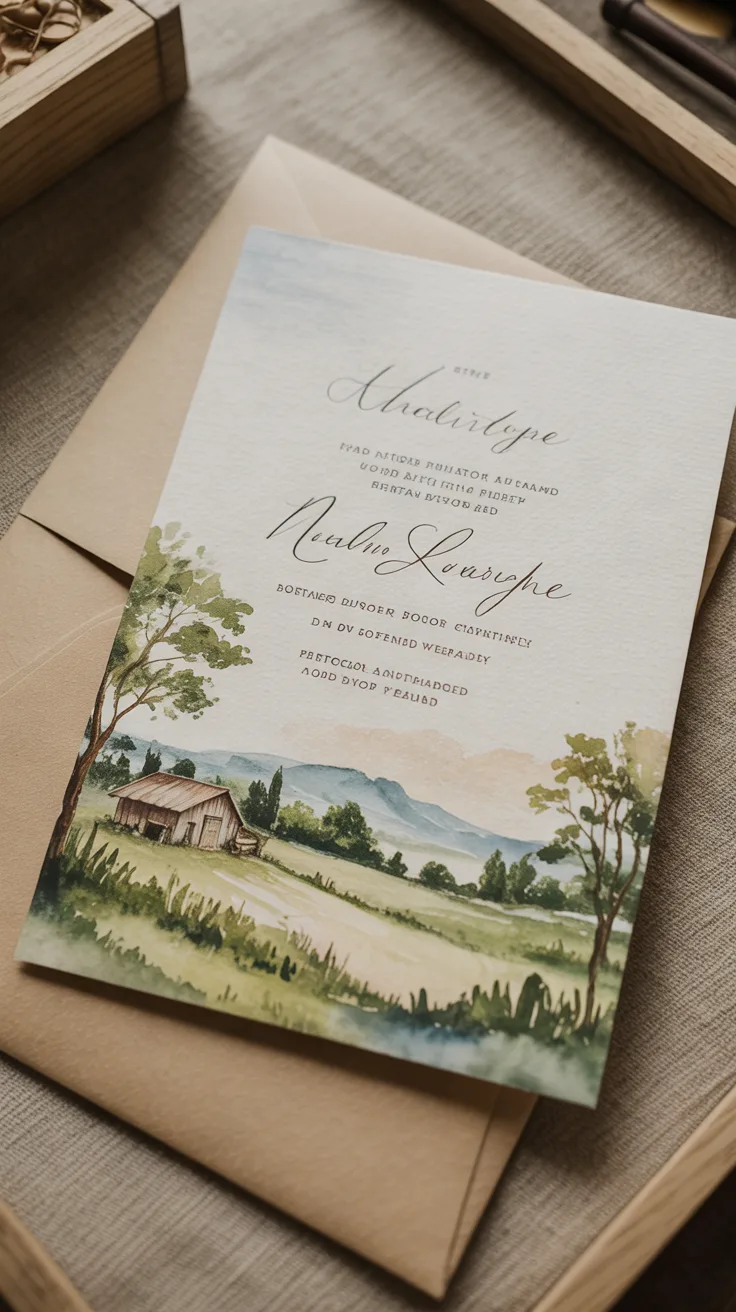
Watercolor invitations can feature landscapes, barns, mountains, trees, or illustrations of the wedding venue. This style works particularly well when the ceremony location is an important part of the wedding.
A watercolor illustration doesn’t need to cover the entire invitation. A small landscape at the top or bottom can provide enough detail while leaving the text easy to read.
What You’ll Need
- Watercolor landscape illustration or digital artwork
- Invitation design template
- Textured white or ivory cardstock
- Color printer or printing service
- Coordinating envelopes
How to Create the Design
- Choose an illustration that matches your venue or wedding setting.
- Place the artwork at the top or bottom of the invitation.
- Add the couple’s names and wedding details in a readable font.
- Use colors from the illustration for small accents or headings.
- Print a sample to check that the artwork isn’t too dark or faded.
- Make any necessary adjustments before printing the full order.
Personalization idea: Use an illustration of your actual wedding venue. You can commission a watercolor artist or create artwork from a venue photograph that you have permission to use.
7. Hand-Lettered Rustic Wedding Invitations
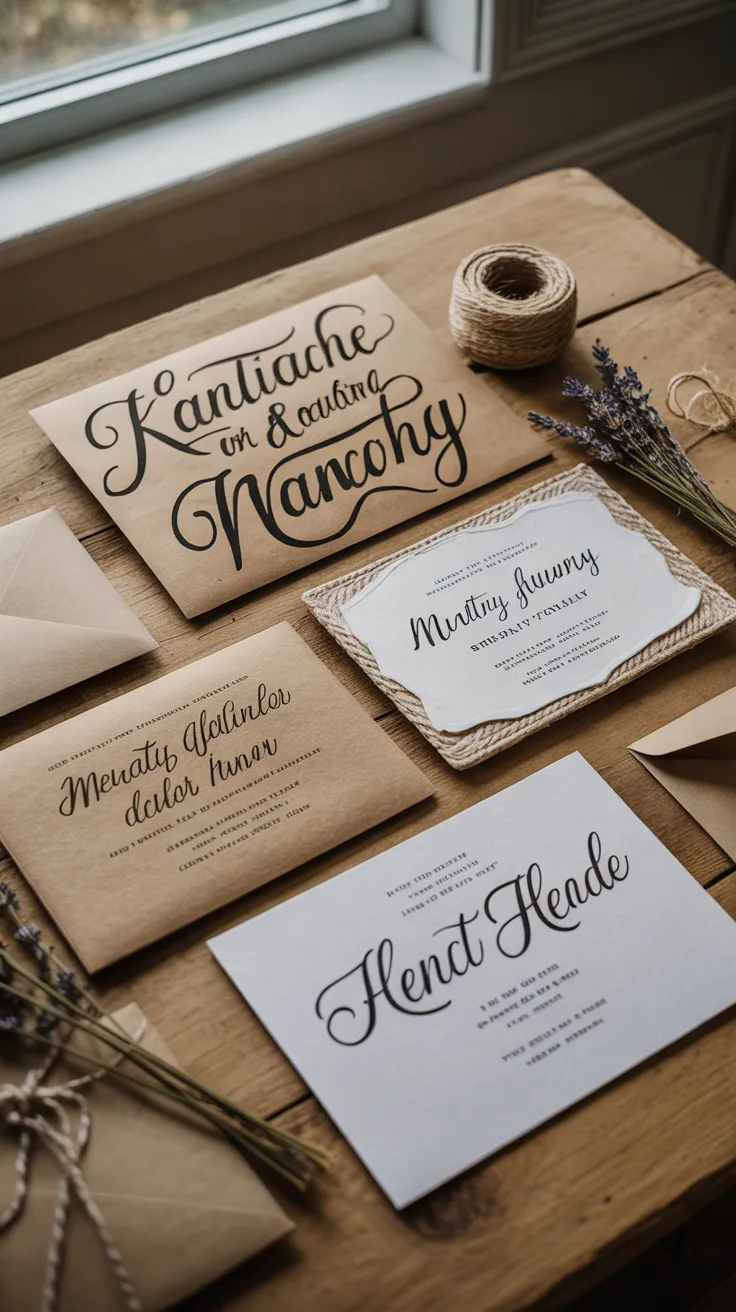
Hand-lettered invitations focus on typography rather than decorative materials. Large script lettering can highlight the couple’s names, while smaller serif or sans-serif text keeps the date, time, and location readable.
This approach works on kraft paper, handmade cardstock, and simple white invitations.
Choosing Your Typography
| Font Style | Best Use | Appearance |
|---|---|---|
| Modern calligraphy | Couple’s names | Soft and romantic |
| Classic serif | Wedding details | Traditional and readable |
| Simple sans-serif | Dates and venue information | Clean and minimal |
How to Create a Hand-Lettered Design
Start with a blank invitation template and choose a script font for the couple’s names. Use a simpler font for the remaining details.
Center the text and leave enough space between sections. Avoid using script lettering for long addresses or important instructions, as decorative fonts can be difficult to read at smaller sizes.
If you’re comfortable with calligraphy, write the names by hand, scan the lettering, and add it to your digital invitation design.
Design tip: Use no more than two or three fonts in the same invitation. Consistent spacing matters more than adding extra decorative lettering.
8. Handmade Paper and Vellum Invitations
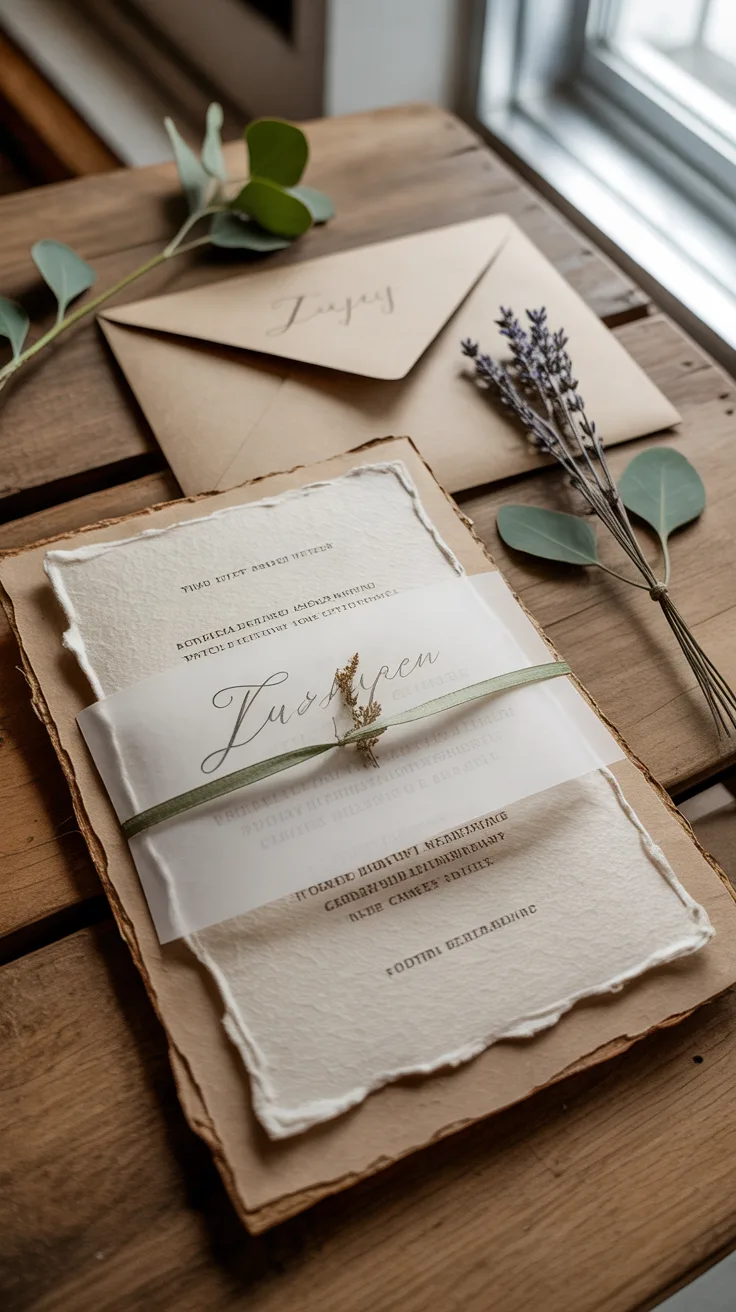
Handmade paper has a slightly uneven surface and may feature deckled edges. Paired with a translucent vellum overlay, it creates a layered invitation without requiring elaborate graphics.
This style suits neutral wedding palettes and minimalist rustic celebrations. Cream, beige, pale gray, and sage are practical color choices.
Materials
- Handmade or deckle-edge invitation paper
- Translucent vellum sheets
- Invitation template
- Paper trimmer
- Paper belly bands or ribbon
- Envelopes
Putting the Invitation Together
Print the main wedding details on handmade cardstock. If your printer can’t handle textured paper, use a professional printing service.
Cut a vellum sheet to the same size as the invitation. Place the vellum over the printed card, then secure both layers with a narrow paper belly band or ribbon.
You can print a small botanical illustration or the couple’s initials on the vellum for additional detail.
Practical tip: Vellum can smudge with certain inks. Print a test sheet and allow it to dry completely before assembling the invitations.
Look for deckle-edge paper and vellum sheets if you’re making layered invitations at home.
9. Seasonal Rustic Wedding Invitations
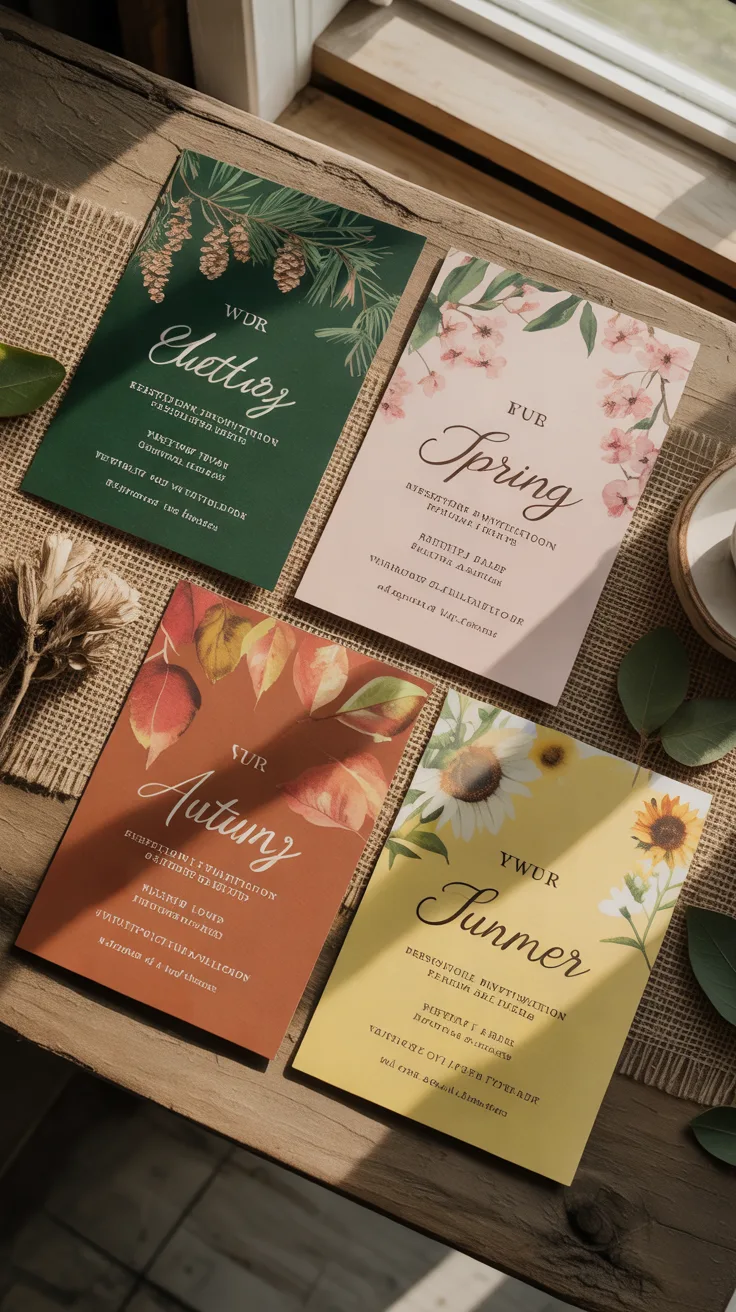
Seasonal colors and illustrations can help connect your invitations to the time of year. You don’t need a completely different design for each season. Changing the paper color, botanical artwork, or small decorative details is often enough.
Spring Rustic Invitations
Use cream cardstock with pale green leaves, small wildflowers, or watercolor branches. Soft pink, sage, and lavender accents work well with natural paper.
How to create: Choose a botanical invitation template, add light floral illustrations around the border, and print on ivory cardstock.
Summer Rustic Invitations
Summer invitations can feature sunflowers, daisies, wildflowers, or simple countryside landscapes. Kraft paper with white or dark green lettering is another option.
How to create: Use a wildflower illustration at the top of the invitation and repeat one of its colors in the names or headings.
Fall Rustic Invitations
Terracotta, burgundy, rust, olive green, and warm brown are suitable colors for autumn weddings. Leaf illustrations and kraft paper work particularly well together.
How to create: Print the invitation on cream cardstock with a muted leaf border, then add a narrow rust-colored ribbon.
Winter Rustic Invitations
Evergreen branches, pinecones, and dark green lettering suit winter countryside weddings. Cream paper and kraft envelopes help keep the design rustic rather than overly formal.
How to create: Add a small evergreen illustration above the couple’s names and use dark green or charcoal lettering for the remaining details.
10. Modern Rustic Wedding Invitations
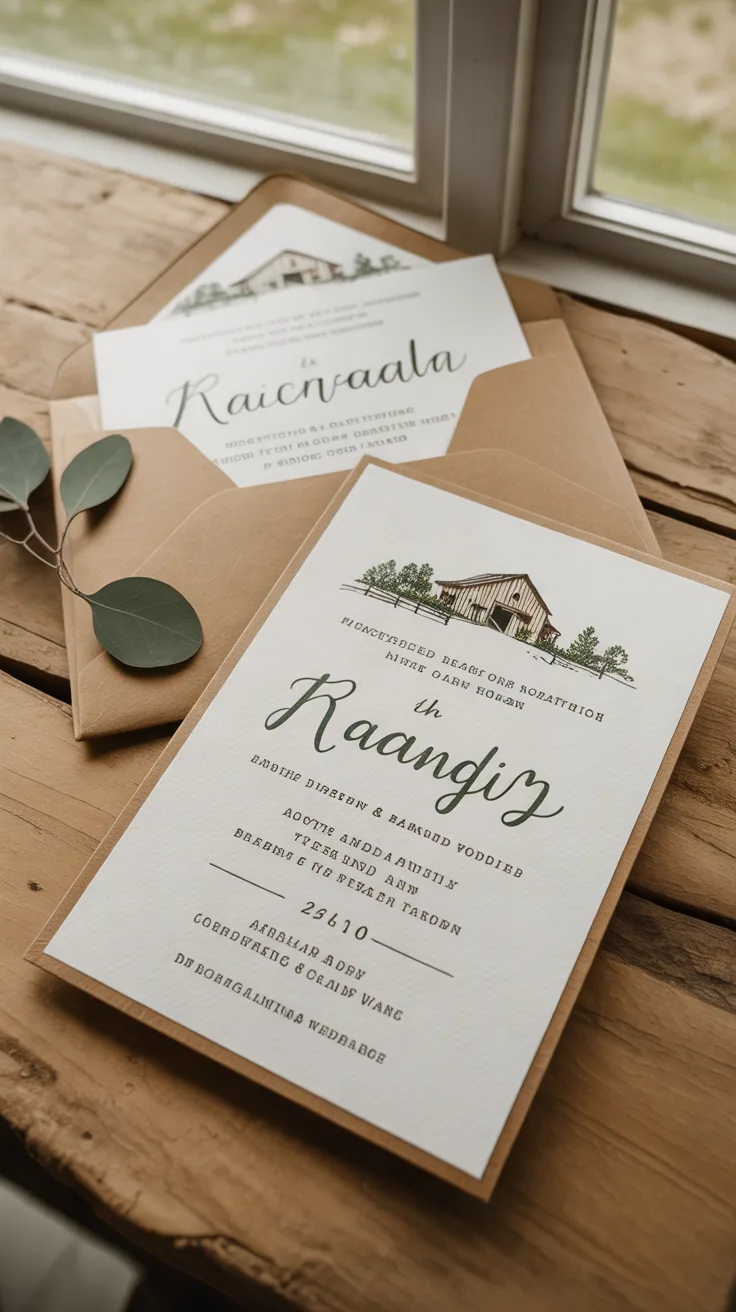
Modern rustic invitations combine natural colors and textures with simple layouts. Instead of decorative borders and multiple embellishments, these designs rely on clean typography, generous spacing, and one or two rustic details.
A cream invitation with dark green lettering and a kraft envelope is one example. Another option is a minimalist invitation with a small line drawing of the wedding venue.
How to Create a Modern Rustic Invitation
Start with the layout: Choose a simple 5-by-7-inch invitation template with centered or left-aligned text.
Choose the colors: Use ivory, kraft brown, sage green, or charcoal.
Add one rustic detail: Include a small botanical illustration, wood-grain accent, or simple venue drawing.
Print the invitation: Use heavyweight cardstock with a matte finish.
Finish the suite: Pair the invitation with a coordinating envelope and matching details card.
Styling tip: Keep the decorative elements limited. A clean layout with one botanical illustration often works better than combining several different rustic motifs.
DIY Rustic Wedding Invitations: Supplies and Planning
Making invitations yourself can reduce printing and assembly costs, particularly when you’re using standard cardstock and simple designs. Specialty materials such as handmade paper, vellum, and wood veneer can increase the cost.
Basic Supplies
- Cardstock or invitation paper
- Envelopes
- Invitation template
- Printer or professional printing service
- Paper trimmer
- Ruler
- Double-sided adhesive
- Optional ribbon, twine, or decorative bands
Example Supply Budget for 100 Invitations
| Supply | Quantity | Estimated Cost |
|---|---|---|
| Cardstock | 120 sheets | $30–$50 |
| Envelopes | 120 | $40–$60 |
| Twine | One 100-yard roll | $8–$15 |
| Printing ink | Varies | Depends on printer and design |
| Decorative accessories | As needed | Varies |
These are rough planning estimates rather than current supplier quotes. Paper size, printing coverage, shipping, and specialty finishes can change the total. The quantity of cardstock needed also depends on how many invitations fit on each sheet.
Tips for Making Invitations at Home
- Complete one finished sample before ordering all your materials.
- Check that your printer supports the cardstock weight.
- Order extra paper and envelopes for printing mistakes.
- Use a paper trimmer for consistent edges.
- Proofread names, dates, addresses, and RSVP details before printing.
- Weigh a completed invitation at the post office if it includes thick paper, ribbon, or other bulky accessories.
Professional Printing vs. DIY Invitations
DIY invitations are a practical choice for simple designs, especially if you already have a suitable printer and paper-cutting equipment. Professional printing is worth considering for specialty finishes, large quantities, and materials that are difficult to print at home.
| Factor | DIY Invitations | Professional Printing |
|---|---|---|
| Cost | Can be lower for simple designs | Depends on quantity and finishes |
| Customization | Full control over assembly | More specialty printing options |
| Time | Requires printing and assembly | Less hands-on work |
| Paper choices | Limited by equipment | Wider selection available |
| Best for | Simple cardstock designs | Foil, letterpress, engraving, and large orders |
You can also combine both methods. Have the main invitations professionally printed, then add twine, ribbon, or paper bands yourself.
When to Order and Send Rustic Wedding Invitations
Allow enough time for design revisions, printing, assembly, and mailing. Handmade invitations generally take longer to prepare than standard printed cards.
- 4–6 months before: Choose your invitation design and confirm the wording.
- 3–4 months before: Order samples, paper, and printing supplies.
- 2–3 months before: Complete printing and assembly.
- 6–8 weeks before: Mail invitations for a typical local wedding.
- 8–12 weeks before: Consider mailing earlier for destination weddings or guests who need to arrange travel.
Set your RSVP deadline based on when your venue or caterer needs the final guest count. Allow additional time to follow up with guests who haven’t responded.
Frequently Asked Questions
What paper is best for rustic wedding invitations?
Kraft cardstock, textured ivory paper, and handmade paper are common choices. Cardstock around 100–120 lb can work well, but check the specifications of your printer before purchasing.
Can I print rustic wedding invitations at home?
Yes. Many rustic designs can be printed using a home inkjet or laser printer. Choose paper compatible with your equipment and print a sample before making the full batch.
Are rustic wedding invitations expensive?
They don’t have to be. Simple kraft cardstock invitations can be relatively inexpensive, while wood veneer, handmade paper, foil printing, and professional calligraphy increase the cost.
What colors work best for rustic invitations?
Kraft brown, ivory, sage green, forest green, dusty rose, burgundy, and terracotta all work with rustic designs. Choose colors that coordinate with your wedding setting and decorations.
Can rustic invitations include modern typography?
Yes. Modern serif and sans-serif fonts work well with natural paper and botanical illustrations. A clean layout can also make the invitation easier to read.
Should I include an RSVP card?
You can include a printed RSVP card or direct guests to an online response form. If you’re using online RSVPs, make the website address or QR code easy to find.
How can I keep handmade invitations from getting damaged in the mail?
Use sturdy envelopes and avoid loose decorative materials. Place fragile embellishments under a paper band or inside a protective sleeve. Check postage requirements for thick or unusually shaped envelopes.
How many extra invitations should I order?
Ordering approximately 10–20% extra can help cover printing mistakes, damaged envelopes, and late additions to the guest list. Remember that couples and families sharing an address may only need one invitation suite.
Final Thoughts
Rustic wedding invitations can be as simple as kraft cardstock with black lettering or as detailed as handmade paper with botanical illustrations and ribbon.
Choose a design that fits your wedding setting, printing budget, and available preparation time. Before making the full order, assemble one complete invitation, including its inserts and envelope, to check the appearance, thickness, and mailing cost.
